코드로 배우는 스프링 웹 프로젝트-17.Ajax 댓글 처리
코드로 배우는 스프링 웹 프로젝트-16.Rest 방식으로 전환
코드로 배우는 스프링 웹 프로젝트 - 개정판
2019년 7월 10일 인쇄판
Part4. Rest 방식과 Ajax를 이용하는 댓글 처리
.
Chapter17. Ajax 댓글 처리
이전 Part3의 예제에 추가 작성.
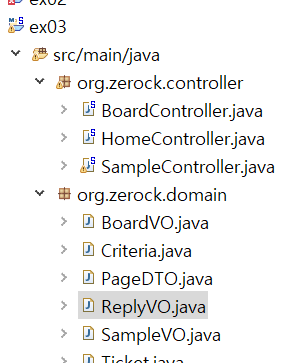
17.1 프로젝트의 구성
REST 처리를 위해 pom.xml에서 수정된 내용이 대부분이므로, ex03에서 사용하던 소스 코드를 복사해서 사용한다.
17.2 댓글 처리를 위한 영속 영역
create table tbl_reply (
    rno number(10, 0),
    bno number(10, 0) not null,
    reply varchar2(1000) not null,
    replyer varchar2(50) not null,
    replyDate date default sysdate,
    updateDate date default sysdate
);

create sequence seq_reply;

alter table tbl_reply add constraint pk_reply primary key(rno);

alter table tbl_reply add constraint fk_reply_board
foreign key (bno) references tbl_board(bno);
17.2.1 ReplyVO 클래스의 추가
org.zerock.domain 패키지 아래 Reply VO 클래스
package org.zerock.domain;

import java.util.Date;

import lombok.Data;

@Data
public class ReplyVO {
	private Long rno;
	private Long bno;

	private String reply;
	private String replyer;
	private Date replyDate;
	private Date updateDate;
}
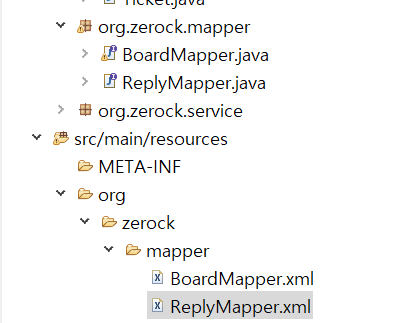
17.2.2 ReplyMapper 클래스와 XML 처리
org.zerock.mapper 패키지에 ReplyMapper 인터페이스를 처리하고 XML 파일도 생성해준다.
<?xml version="1.0" encoding="UTF-8"?>
<!DOCTYPE mapper
PUBLIC "-//mybatis.org//DTD Mapper 3.0//EN"
"http://mybatis.org/dtd/mybatis-3-mapper.dtd">

<mapper namespace="org.zerock.mapper.ReplyMapper">


</mapper>
XML 위와 같이 작성
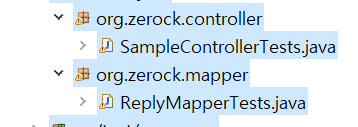
ReplyMapper 테스트
src/text/java에 org/zerock/mapper 밑 ReplyMapperTests.java 추가
package org.zerock.mapper;
import org.junit.Before;
import org.junit.Test;
import org.junit.runner.RunWith;
import org.springframework.beans.factory.annotation.Autowired;
import org.springframework.test.context.ContextConfiguration;
import org.springframework.test.context.junit4.SpringJUnit4ClassRunner;

import lombok.Setter;
import lombok.extern.log4j.Log4j;

@RunWith(SpringJUnit4ClassRunner.class)
@ContextConfiguration("file:src/main/webapp/WEB-INF/spring/root-context.xml")
//Java Config
//@ContextConfiguration(classes={org.zerock.config.RootConfig.class})
@Log4j
public class ReplyMapperTests {
	@Setter(onMethod_ = {@Autowired})
	private ReplyMapper mapper;

	@Test
	public void testMapper( ) {
		log.info(mapper);
	}
}

testMapper()로 ReplyMapper 타입 객체가 정상 사용 가능한지 확인
17.2.3 CRUD 작업
등록 create
우선은 외래키를 사용하는 등록 작업 진행
import org.zerock.domain.ReplyVO;

ackage org.zerock.mapper;

public interface ReplyMapper {
	public int insert(ReplyVO vo);
}
xml
<?xml version="1.0" encoding="UTF-8"?>
<!DOCTYPE mapper
PUBLIC "-//mybatis.org//DTD Mapper 3.0//EN"
"http://mybatis.org/dtd/mybatis-3-mapper.dtd">

<mapper namespace="org.zerock.mapper.ReplyMapper">

<insert id="insert">
	insert into tbl_reply (rno, bno, reply, replyer)
	values (seq_reply.nextval, #{bno}, #{reply}, #{replyer})
</insert>

</mapper>
package org.zerock.mapper;
import java.util.stream.IntStream;
import org.junit.Before;
import org.junit.Test;
import org.junit.runner.RunWith;
import org.springframework.beans.factory.annotation.Autowired;
import org.springframework.test.context.ContextConfiguration;
import org.springframework.test.context.junit4.SpringJUnit4ClassRunner;
import org.zerock.domain.ReplyVO;
import org.zerock.mapper.ReplyMapper;
import lombok.Setter;
import lombok.extern.log4j.Log4j;
@RunWith(SpringJUnit4ClassRunner.class)
@ContextConfiguration("file:src/main/webapp/WEB-INF/spring/root-context.xml")
//Java Config
//@ContextConfiguration(classes={org.zerock.config.RootConfig.class})
@Log4j
public class ReplyMapperTests {
@Setter(onMethod_ = {@Autowired})
private ReplyMapper mapper;
//테스트 전에 해당 번호 게시물이 존재하는지 꼭 확인
private Long[] bnoArr = {1310732L, 1310731L, 1310730L, 1310729L, 1310728L };
@Test
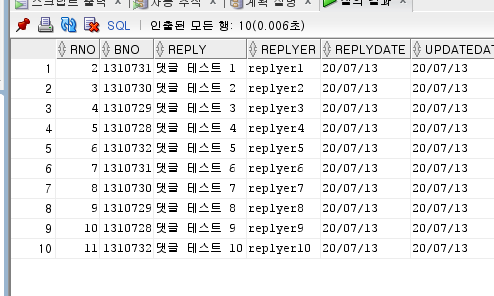
public void testCreate() {
IntStream.rangeClosed(1, 10).forEach(i->{
ReplyVO vo = new ReplyVO();
vo.setBno(bnoArr[i%5]);
vo.setReply("댓글 테스트 " + i);
vo.setReplyer("replyer" + i);
mapper.insert(vo);
});
}
@Test
public void testMapper( ) {
log.info(mapper);
}
}
테스트는 위와 같이 진행
조회(read)
Mapper 인터페이스와 xml에 조회 처리 추가
package org.zerock.mapper;
import org.zerock.domain.ReplyVO;

public interface ReplyMapper {
	public int insert(ReplyVO vo);
	public ReplyVO read(Long bno);
}
<?xml version="1.0" encoding="UTF-8"?>
<!DOCTYPE mapper
PUBLIC "-//mybatis.org//DTD Mapper 3.0//EN"
"http://mybatis.org/dtd/mybatis-3-mapper.dtd">

<mapper namespace="org.zerock.mapper.ReplyMapper">

<insert id="insert">
	insert into tbl_reply (rno, bno, reply, replyer)
	values (seq_reply.nextval, #{bno}, #{reply}, #{replyer})
</insert>

<select id="read" resultType="org.zerock.domain.ReplyVO">
	select * from tbl_reply where rno=#{rno}
</select>
</mapper>
테스트)
	@Test
	public void testRead() {
		Long targetRno = 5L;
		ReplyVO vo = mapper.read(targetRno);
		log.info(vo);
	}
	@
삭제(delete)
Mapper 인터페이스와 xml에 삭제 처리 추가
package org.zerock.mapper;
import org.zerock.domain.ReplyVO;

public interface ReplyMapper {
	public int insert(ReplyVO vo);
	public ReplyVO read(Long bno);
	public int delete(Long rno);
}
<delete id="delete">
	delete from tbl_reply where rno=#{rno}
</delete>
테스트)
	@Test
	public void testDelete() {
		Long targetRno = 2L;
		mapper.delete(targetRno);
	}
수정(update)
Mapper 인터페이스와 xml에 수정 처리 추가
package org.zerock.mapper;
import org.zerock.domain.ReplyVO;

public interface ReplyMapper {
	public int insert(ReplyVO vo);
	public ReplyVO read(Long bno);
	public int delete(Long rno);
	public int update(ReplyVO reply);
}
<update id="update">
	update tbl_reply set reply=#{reply}, updatedate = sysdate where rno=#{rno}
</update>

</mapper>
테스트)
	@Test
	public void testUpdate() {
		Long targetRno = 3L;
		ReplyVO vo = mapper.read(targetRno);

		vo.setReply("Update Reply ");
		int count = mapper.update(vo);

		log.info("UPDATE COUNT: " + count);
	}
17.2.4 @Param 어노테이션과 댓글 목록
MyBatis는 두개 이상이 데이터를 파라미터로 전달하기 위해선
1) 별도의 객체로 구성하거나 2)Map 이용 방식 3) Param을 이용해 이름을 사용하는 방식이 있다.
@Param 의 속성값은 MyBatis에서 SQL을 이용할 떄 #{}의 이름으로 사용 가능하다.
ReplyMapper Interface
package org.zerock.mapper;
import java.util.List;

import org.apache.ibatis.annotations.Param;
import org.zerock.domain.Criteria;
import org.zerock.domain.ReplyVO;

public interface ReplyMapper {
	public int insert(ReplyVO vo);
	public ReplyVO read(Long bno);
	public int delete(Long rno);
	public int update(ReplyVO reply);
	public List<ReplyVO> getListWithPaging (
			@Param("cri") Criteria cri,
			@Param("bno") Long bno);
}
xml
package org.zerock.mapper;
import java.util.List;

import org.apache.ibatis.annotations.Param;
import org.zerock.domain.Criteria;
import org.zerock.domain.ReplyVO;

public interface ReplyMapper {
	public int insert(ReplyVO vo);
	public ReplyVO read(Long bno);
	public int delete(Long rno);
	public int update(ReplyVO reply);
	public List<ReplyVO> getListWithPaging (
			@Param("cri") Criteria cri,
			@Param("bno") Long bno);
}
테스트)
	@Test
	public void testList() {
		Criteria cri = new Criteria();
		List<ReplyVO> replies = mapper.getListWithPaging(cri, bnoArr[0]);
		replies.forEach(reply->log.info(reply));
	}
17.3 서비스 영역과 Controller 처리
ReplyService Interface
package org.zerock.service;

import java.util.List;

import org.zerock.domain.Criteria;
import org.zerock.domain.ReplyVO;

public interface ReplyService {
	public int register(ReplyVO vo);
	public ReplyVO get(Long rno);
	public int modify(ReplyVO vo);
	public int remove(Long rno);
	public List<ReplyVO> getList(Criteria cri, Long bno);
}
ReplyServiceImpl 클래스
package org.zerock.service;

import java.util.List;

import org.springframework.beans.factory.annotation.Autowired;
import org.springframework.stereotype.Service;
import org.zerock.domain.Criteria;
import org.zerock.domain.ReplyVO;
import org.zerock.mapper.ReplyMapper;

import lombok.Setter;
import lombok.extern.log4j.Log4j;

@Service
@Log4j
public class ReplyServiceImpl implements ReplyService{

	@Setter(onMetod_ = @Autowired)
	private ReplyMapper mapper;


	@Override
	public int register(ReplyVO vo) {
		log.info("register......" + vo);
		return mapper.insert(vo);
	}

	@Override
	public ReplyVO get(Long rno) {
		log.info("get......" + rno);
		return mapper.read(rno);
	}

	@Override
	public int modify(ReplyVO vo) {
		log.info("modify......" + vo);
		return mapper.update(vo);
	}

	@Override
	public int remove(Long rno) {
		log.info("remove......" + rno);
		return mapper.delete(rno);
	}

	@Override
	public List<ReplyVO> getList(Criteria cri, Long bno) {
		log.info("get Reply List of a Board " + bno);
		return mapper.getListWithPaging(cri, bno);
	}

}
위와 같이 생성
17.3.1 ReplyController의 설계
@RestController 어노테이션으로 다음 같은 URL을 기준으로 동작하도록 작성
| 작업 | URL | HTTP 전송방식 |
| 등록 | /replies/new | POST |
| 조회 | /replies/:rno | GET |
| 삭제 | /replies/:rno | DELETE |
| 수정 | /replies/:rno | PUT or PATCH |
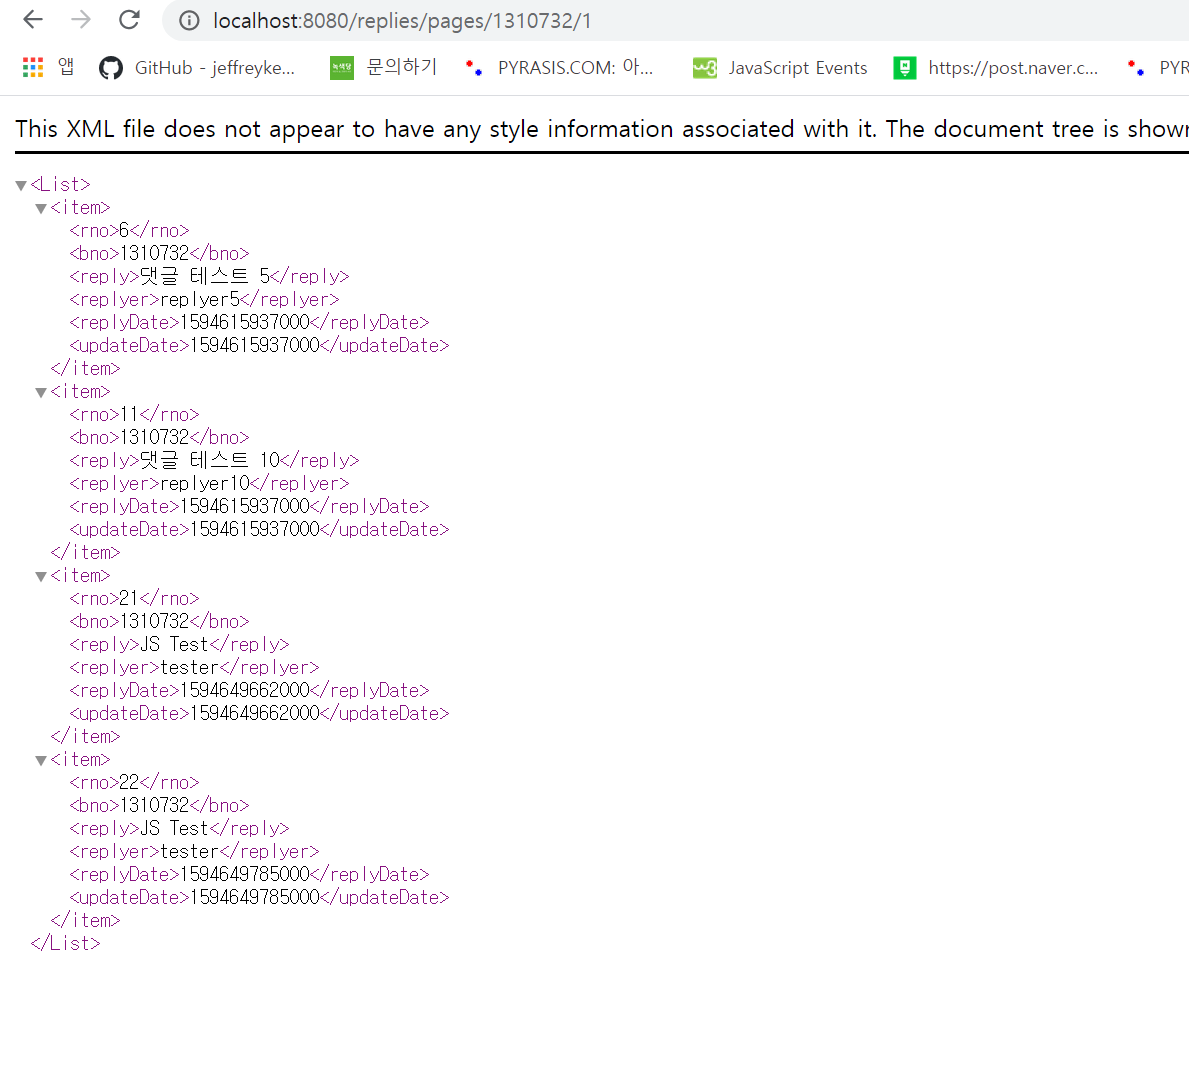
| 페이지 | /replies/pages/:bno/:page | GET |
REST 방식으로 동작하는 URL을 설계할 땐 PK를 기준으로 작성하는 게 좋다.
다만 댓글의 목록은 PK를 사용할 수 없으므로 bno와 page 정보들을 URL에서 표현하는 방식 사용.
org.zerock.controller 패키지 밑에 ReplyController.java 생성
package org.zerock.controller;

import org.springframework.web.bind.annotation.RequestMapping;
import org.springframework.web.bind.annotation.RestController;
import org.zerock.service.ReplyService;

import lombok.AllArgsConstructor;
import lombok.extern.log4j.Log4j;

@RequestMapping("/replies/")
@RestController
@Log4j
@AllArgsConstructor
public class ReplyController {
	private ReplyService service;
}
17.3.2 등록 작업과 테스트
REST 방식 처리에서 주의점은 브라우저나 외부에서 서버를 호출할 때 데이터 포맷과 서버에서 보내주는 데이터의 타입을 명확히 설계해야 하는 것.
예를 들어 댓글 등록은 브라우저에선 JSON 타입으로 된 댓글 데이터를 전송하고 서버에선 댓글의 처리 결과가 정상적으로 되었는지 문자열로 결과를 알려 주도록 한다.
package org.zerock.controller;

import org.springframework.http.HttpStatus;
import org.springframework.http.MediaType;
import org.springframework.http.ResponseEntity;
import org.springframework.web.bind.annotation.PostMapping;
import org.springframework.web.bind.annotation.RequestBody;
import org.springframework.web.bind.annotation.RequestMapping;
import org.springframework.web.bind.annotation.RestController;
import org.zerock.domain.ReplyVO;
import org.zerock.service.ReplyService;

import lombok.AllArgsConstructor;
import lombok.extern.log4j.Log4j;

@RequestMapping("/replies/")
@RestController
@Log4j
@AllArgsConstructor
public class ReplyController {
	private ReplyService service;

	@PostMapping(value = "/new", consumes="application/json", produces= {MediaType.TEXT_PLAIN_VALUE})
	public ResponseEntity<String> create(@RequestBody ReplyVO vo) {

		log.info("ReplyVO: " + vo);
		int insertCount = service.register(vo);

		log.info("Reply INSERT COUNT: " + insertCount);

		return insertCount==1 ? new ResponseEntity<> ("success", HttpStatus.OK)
				: new ResponseEntity<>(HttpStatus.INTERNAL_SERVER_ERROR);
	}
}
create()는 PostMapping으로 POST 방식으로 동작하도록 설계, consumes와 produces를 통해 json 방식 데이터만 처리하도록 하고 문자열을 반환하도록 설계. create의 파라미터는 @RequestBody를 적용해 JSON 데이터를 ReplyVO 타입으로 변환하도록 지정.
create는 내부적으로 ReplyServiceImpl을 호출해 register를 부르고 댓글이 추가된 숫자를 확인해서 브라우저에 200 혹은 500을 반환하도록 한다.
17.3.3 특정 게시물의 댓글 목록 확인
ReplyController 클래스 일부.
package org.zerock.controller;

import java.util.List;

import org.springframework.http.HttpStatus;
import org.springframework.http.MediaType;
import org.springframework.http.ResponseEntity;
import org.springframework.web.bind.annotation.GetMapping;
import org.springframework.web.bind.annotation.PathVariable;
import org.springframework.web.bind.annotation.PostMapping;
import org.springframework.web.bind.annotation.RequestBody;
import org.springframework.web.bind.annotation.RequestMapping;
import org.springframework.web.bind.annotation.RestController;
import org.zerock.domain.Criteria;
import org.zerock.domain.ReplyVO;
import org.zerock.service.ReplyService;

import lombok.AllArgsConstructor;
import lombok.extern.log4j.Log4j;

@RequestMapping("/replies/")
@RestController
@Log4j
@AllArgsConstructor
public class ReplyController {
	private ReplyService service;

	@PostMapping(value = "/new", consumes="application/json", produces= {MediaType.TEXT_PLAIN_VALUE})
	public ResponseEntity<String> create(@RequestBody ReplyVO vo) {

		log.info("ReplyVO: " + vo);
		int insertCount = service.register(vo);

		log.info("Reply INSERT COUNT: " + insertCount);

		return insertCount==1 ? new ResponseEntity<> ("success", HttpStatus.OK)
				: new ResponseEntity<>(HttpStatus.INTERNAL_SERVER_ERROR);
	}

	@GetMapping(value="/pages/{bno}/{page}", produces= {
			MediaType.APPLICATION_XML_VALUE, MediaType.APPLICATION_JSON_VALUE
	})
	public ResponseEntity<List<ReplyVO>> getList(
			@PathVariable("page") int page,
			@PathVariable("bno") Long bno
			) {
		log.info("getList...............");
		Criteria cri = new Criteria(page, 10);
		log.info(cri);
		return new ResponseEntity<>(service.getList(cri, bno), HttpStatus.OK);
	}
}
17.3.4 댓글 삭제/조회
	@GetMapping(value="/{rno}", produces= {
			MediaType.APPLICATION_XML_VALUE, MediaType.APPLICATION_JSON_UTF8_VALUE
	})
	public ResponseEntity<ReplyVO> get(@PathVariable("rno") Long rno )
	{

		log.info("get : " + rno);
		return new ResponseEntity<>(service.get(rno), HttpStatus.OK);
	}


	@DeleteMapping(value="/{rno}", produces = {
			MediaType.TEXT_PLAIN_VALUE
	})
	public ResponseEntity<String> remove(@PathVariable("rno") Long rno){
		log.info("remove : " + rno);
		return service.remove(rno) == 1
				? new ResponseEntity<>("success", HttpStatus.OK)
						: new ResponseEntity<> (HttpStatus.INTERNAL_SERVER_ERROR);
	}
ReplyController 수정
17.3.5 댓글 수정
	@RequestMapping(method= {RequestMethod.PUT, RequestMethod.PATCH},
			value="/{rno}",
			consumes="application/json",
			produces = {MediaType.TEXT_PLAIN_VALUE})
	public ResponseEntity<String> modify(
			@RequestBody ReplyVO vo,
			@PathVariable("rno") Long rno) {
		vo.setRno(rno);
		log.info("rno : " + rno);
		log.info("modify : " + vo);

		return service.modify(vo) == 1
				? new ResponseEntity<> ("success", HttpStatus.OK)
						: new ResponseEntity<> (HttpStatus.INTERNAL_SERVER_ERROR);
	}
17.4 JavaSCript 준비
JSP 내에서 댓글에 대한 처리는 하나의 페이지 내에서 모든 작업이 이루어지므로 조금 복잡하게 느껴진다.
17.4.1 JavaScript의 모듈화
jQuery는 막강한 기능과 플러그인들을 통해 많은 플젝에서 기본으로 사용된다.
특히 Ajax를 사용하는 경우 많이 사용된다.
화면 내에서 JavaScript 처리를 하다보면 어느 순간 이벤트 처리와 DOM 처리, Ajax 처리 등이 너무 섞여 유지보수하기 힘든 코드를 만드는 경우가 많다.
이런 경우를 대비해 좀 더 JavaScript를 하나의 모듈처럼 구성하는 방식을 사용하면 좋다.
가장 많이 사용하는 것은 모듈 패턴으로 관련있는 함수들을 하나의 모듈처럼 묶음으로 구성하는 것을 의미한다.
JavaScript의 클로저를 이용하는 것이 가장 대표적인 방법.
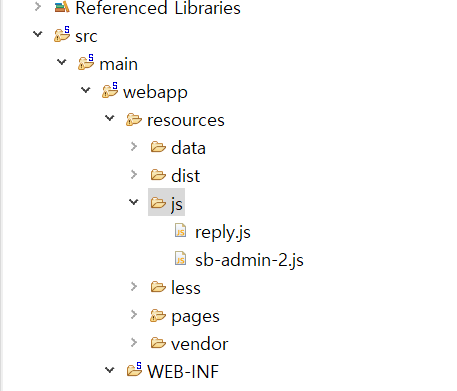
src>main>resources 내에 js 폴더 하위에 reply.js 파일 작성
console.log("Reply Module...............");
var replyService={};
reply.js는 게시물의 조회 페이지에 사용하기 위해 작성된 것이므로 views/board/get.jsp에 추가하자.
get.jsp의 이전에 만든 이벤트 처리 바로 위쪽에 추가해둔다.
브라우저에 게시물 읽기 페이지를 호출해 reply.js가 console에서 실행되는지 살펴본다.
모듈 구성하기
모듈 패턴은 쉽게 말해 Java 클래스처럼 Javascript를 이용해 메서드를 가지는 객체로 구성.
JAvaScript의 즉시 실행함수와 {}로 객체를 구성.
console.log("Reply Module...............");
var replyService= (function() {
	return {name:"AAAA"};
})();
JavaScript의 즉시 실행 함수는 () 안에 함수를 선언하고 바깥쪽에서 실행해 버린다.즉시 실행함수는 함수의 실행 결과가 바깥쪽에 선언된 변수에 할당된다. 위의 코드에선 replyService 변수에 name이라는 속성에 AAAA라는 속성값을 가진 객체가 할당된다.
	<script type="text/javascript" src="/resources/js/reply.js"></script>

	<script type="text/javascript">
	$(document).ready(function() {
		console.log(replyService);
	});
	</script>
위는 get.jsp의 일부
jQuery의 $(document).ready는 한 페이지 내에 여러 번 나와도 상관없다.
기존의 javascript를 수정하지 않으려면 위에서처럼 별도의 script 태그로 분리해도 무방함

17.4.2 reply.js 등록 처리
모듈 패턴은 즉시 실행 함수 내부에서 필요한 메서드를 구성해 객체를 구성하는 방식이다.
console.log("Reply Module...............");
var replyService = (function() {
	function add(reply, callback) {
		console.log("reply.............");
	}
	return {add:add};
})();
위는 reply.js
개발자 도구에는 replyService 객체 안에 add 메서드가 존재하는 형태로 보이게 된다.
외부에는 replyService.add(객체, 콜백)을 전달하는 형태로 호출되는데 Ajax 호출은 감춰져 있으므로 코드를 좀 더 깔끔하게 작성할 수 있다.
console.log("Reply Module...............");
var replyService = (function() {
	function add(reply, callback, error) {
		console.log("add reply.........");
		$.ajax({
			type: 'post',
			url: '/replies/new',
			data : JSON.stringify(reply),
			contentType : "application/json; charset=utf-8",
			success: function(result, status, xhr) {
				if(callback) {
					callback(result);
				}
			},
			error : function(xhr, status, er){
				if(error) {
					error(er);
				}
			}
		})
	}
	return {
		add:add
	};
})();
add()에서 주의깊게 봐야하는 부분은 데이터 전송 타입이 application/json; charset=utf-8 방식으로 전송한다는 점과 파라미터로 callback과 error를 함수로 받는다는 점이다. 만일 Ajax 호출이 성공하고 callback 값으로 적절한 함수가 존재하면 해당 함수를 호출해 결과를 반영하는 방식.
JavaScript는 특이하게도 함수의 파라미터 개수를 일치시킬 필요가 없다.
callback이나 error와 같은 파라미터는 필요에 따라 작성할 수 있다.
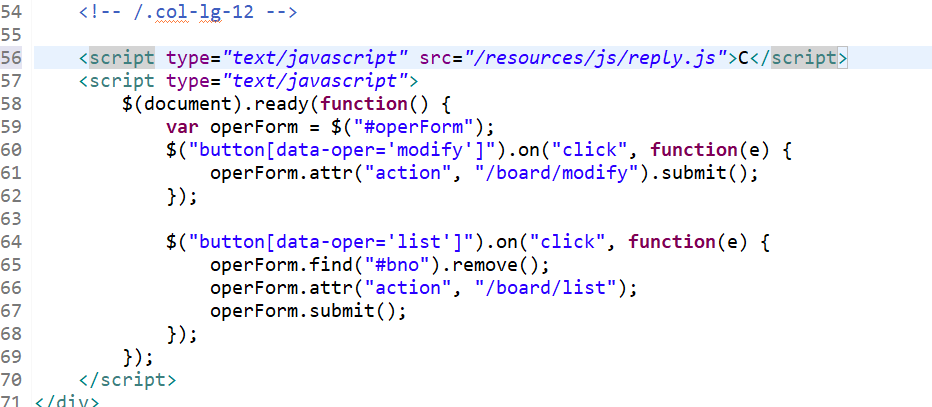
get.jsp에서 테스트를 위해 replyService.add()를 호출시켜보자.
		<!-- /.panel -->
	</div>
	<!-- /.col-lg-12 -->

	<script type="text/javascript" src="/resources/js/reply.js"></script>

	<script type="text/javascript">
	console.log("=================");
	console.log("JS TEST");

	var bnoValue='<c:out value="${board.bno}"/>';
	//for replyService add test
	replyService.add(
			{reply: "JS Test", replyer:"tester", bno:bnoValue}
			,
			function(result) {
				alert("RESULT : " + result);
			}
	);
	</script>
get.jsp 내부에선 Ajax 호출은 replyService라는 이름의 객체에 감춰져 있으므로 필요 파라미터들만 전달하는 형태로 간결해진다. replyService의 add에 던져야 하는 파라미터는 JavaScript 객체 타입으로 만들어 전송해주고, Ajax 결과를 처리하는 함수를 파라미터로 같이 전달한다.
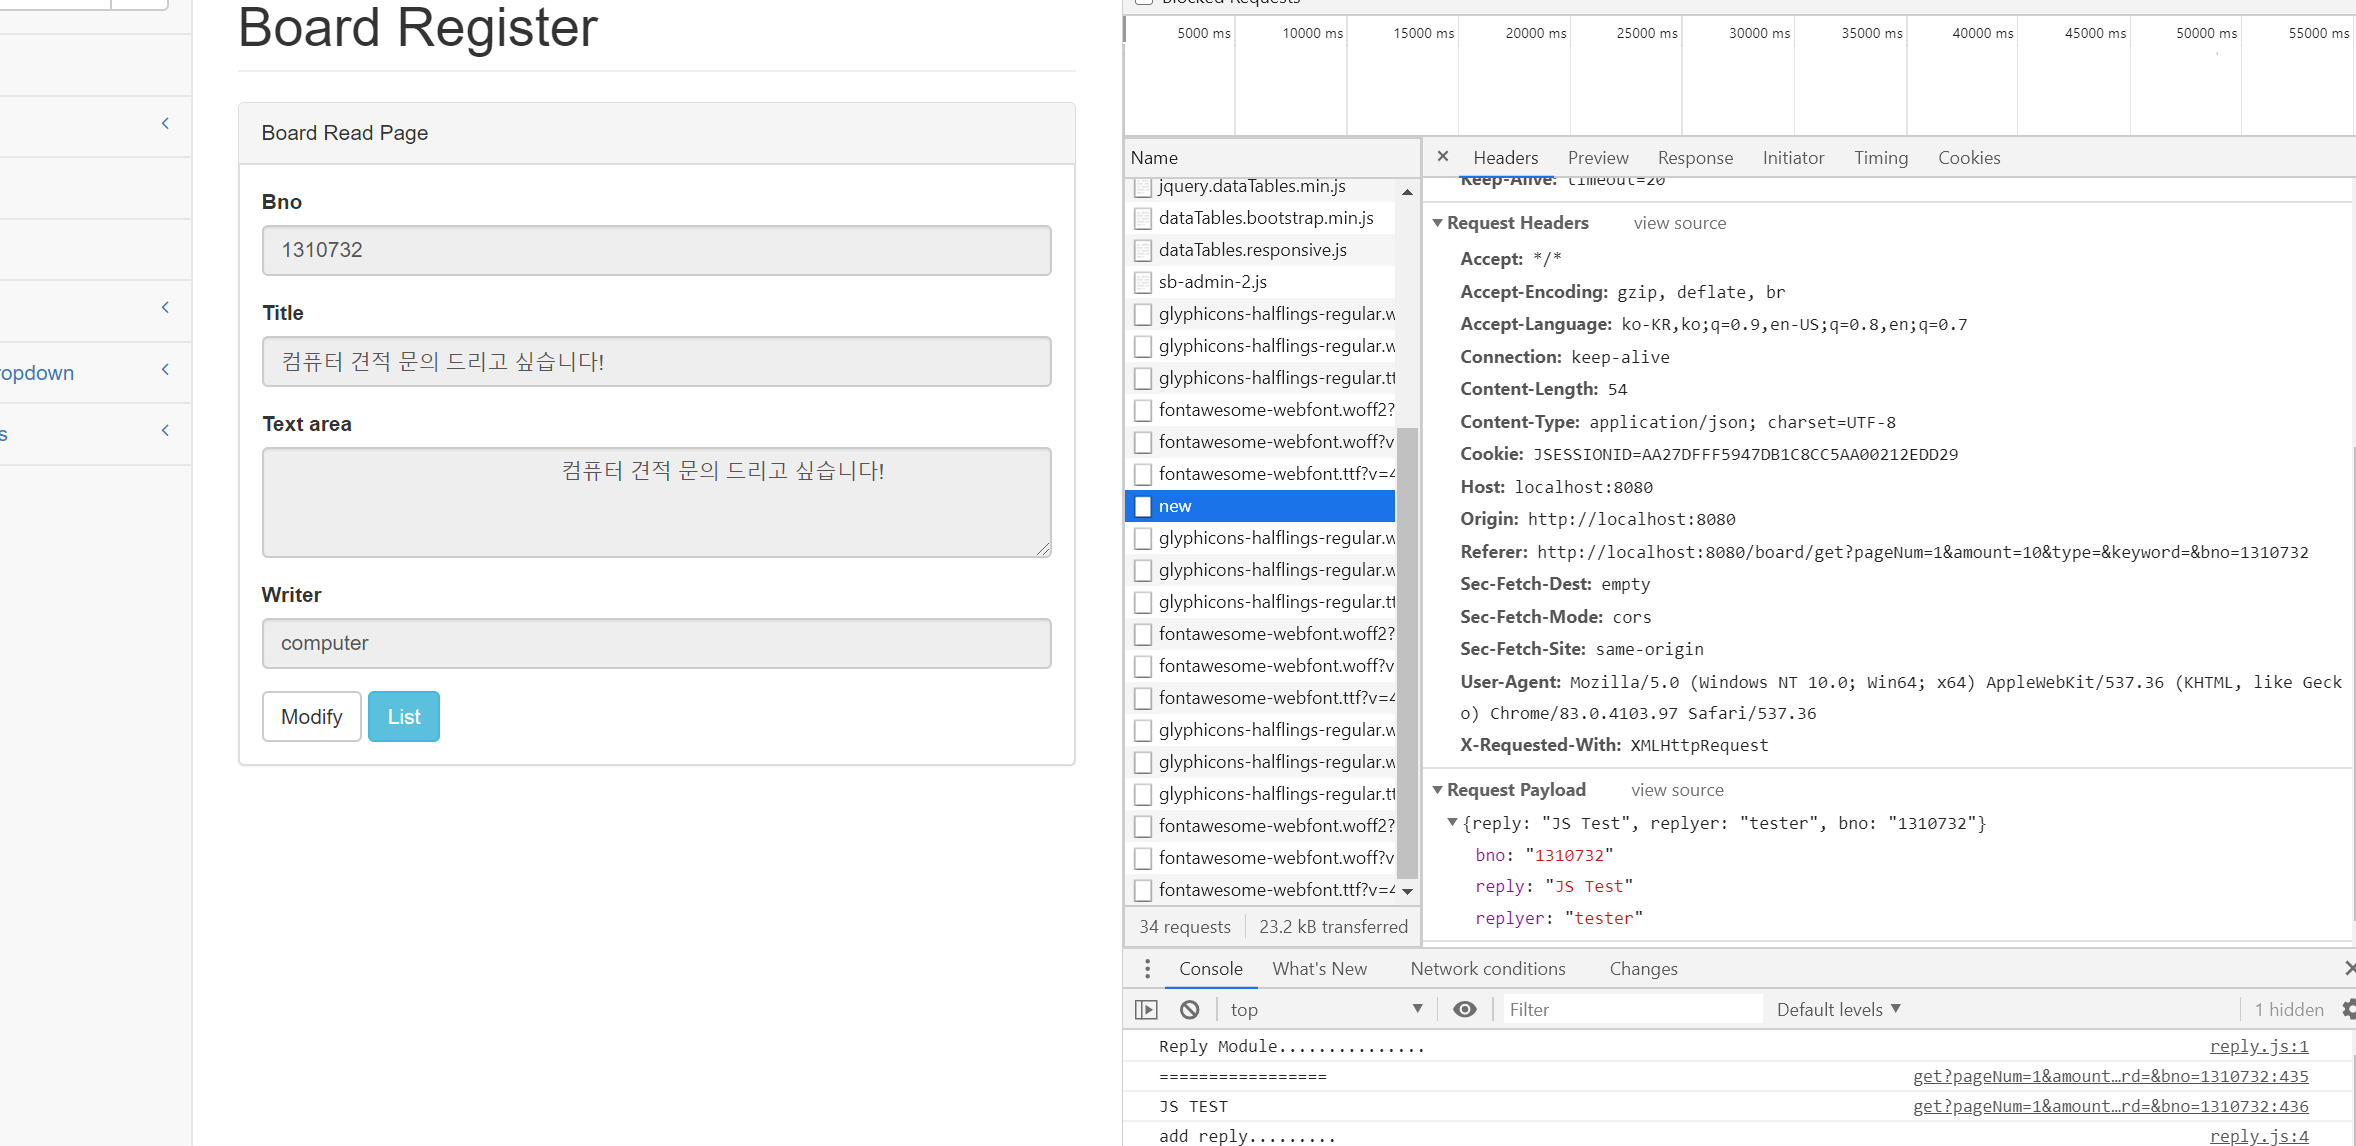
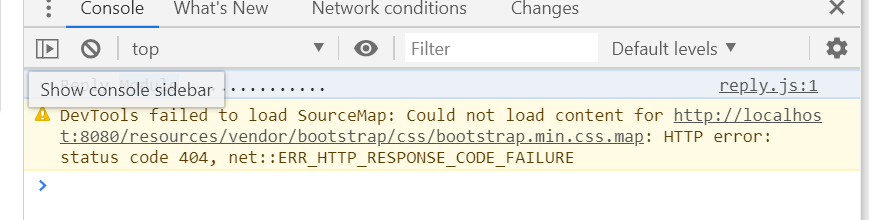
Tomcat에서 실행하면 DB에 정상적으로 댓글이 추가되어야 하고 브라우저에선 경고창이 보여야 한다
브라우저에서 JSON 형태로 데이터가 전송되고 있음도 확인할 수 있어야 한다.
17.4.3 댓글의 목록 처리
다음 단계에선 해당 게시물의 댓글 전체 목록을 가져온다.
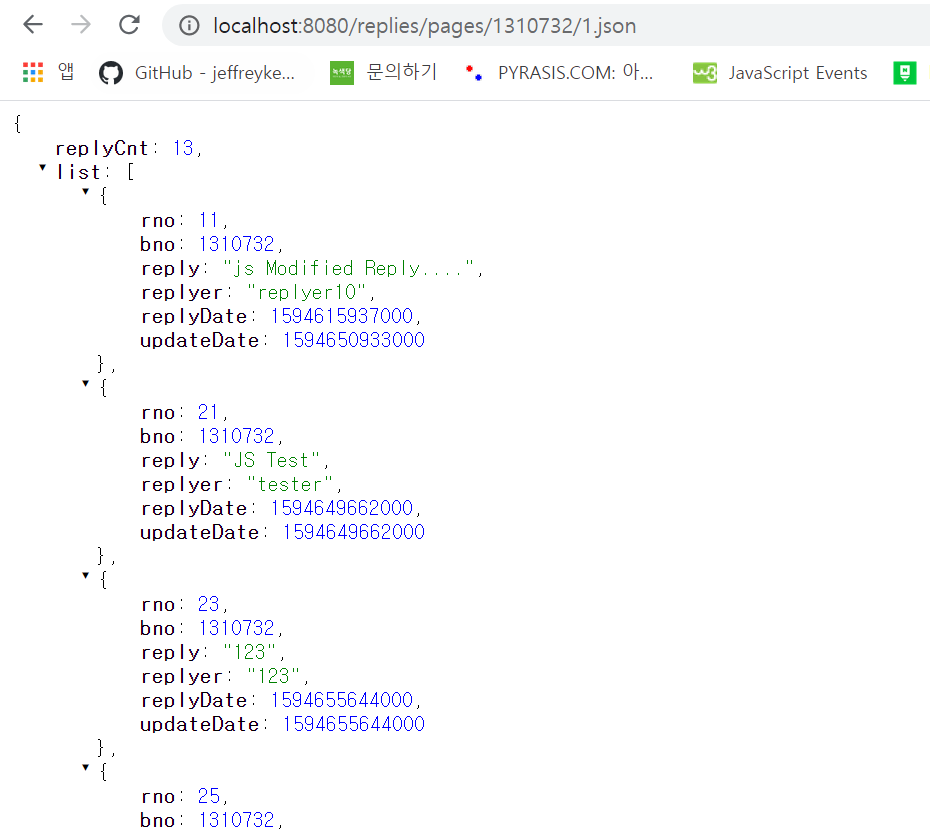
/replies/pages/게시물번호/페이지번호.xml 혹은 .json 형태로 데이터를 먼저 확인할 수 있다.
getJSON() 사용
reply.js에서 Ajax 호출을 담당하므로 jQuey의 getJSON을 이용해 처리할 수 있다!
console.log("Reply Module...............");
var replyService = (function() {
	function add(reply, callback, error) {
		console.log("add reply.........");
		$.ajax({
			type: 'post',
			url: '/replies/new',
			data : JSON.stringify(reply),
			contentType : "application/json; charset=utf-8",
			success: function(result, status, xhr) {
				if(callback) {
					callback(result);
				}
			},
			error : function(xhr, status, er){
				if(error) {
					error(er);
				}
			}
		})
	}

	function getList(param, callback, error) {
		var bno = param.bno;
		var page = param.page || 1;

		$.getJSON("/replies/pages/" + bno + "/" + page + ".json",
			function(data) {
				if(callback) {
					callback(data);
				}
			}).fail(function(xhr, status, err) {
				if(error) {
					error();
				}
			});
	}
	return {
		add:add,
		getList:getList
	};
})();
getList는 param이라는 객체를 통해 핑료 파라미터를 전달받아 JSON 목록을 호출한다.
JSON 형태가 필요하므로 URL 호출 시 확장자를 json으로 요구한다.
<script type="text/javascript" src="/resources/js/reply.js"></script>
<script type="text/javascript">
console.log("=================");
console.log("JS TEST");
var bnoValue='<c:out value="${board.bno}"/>';
//for replyService add test
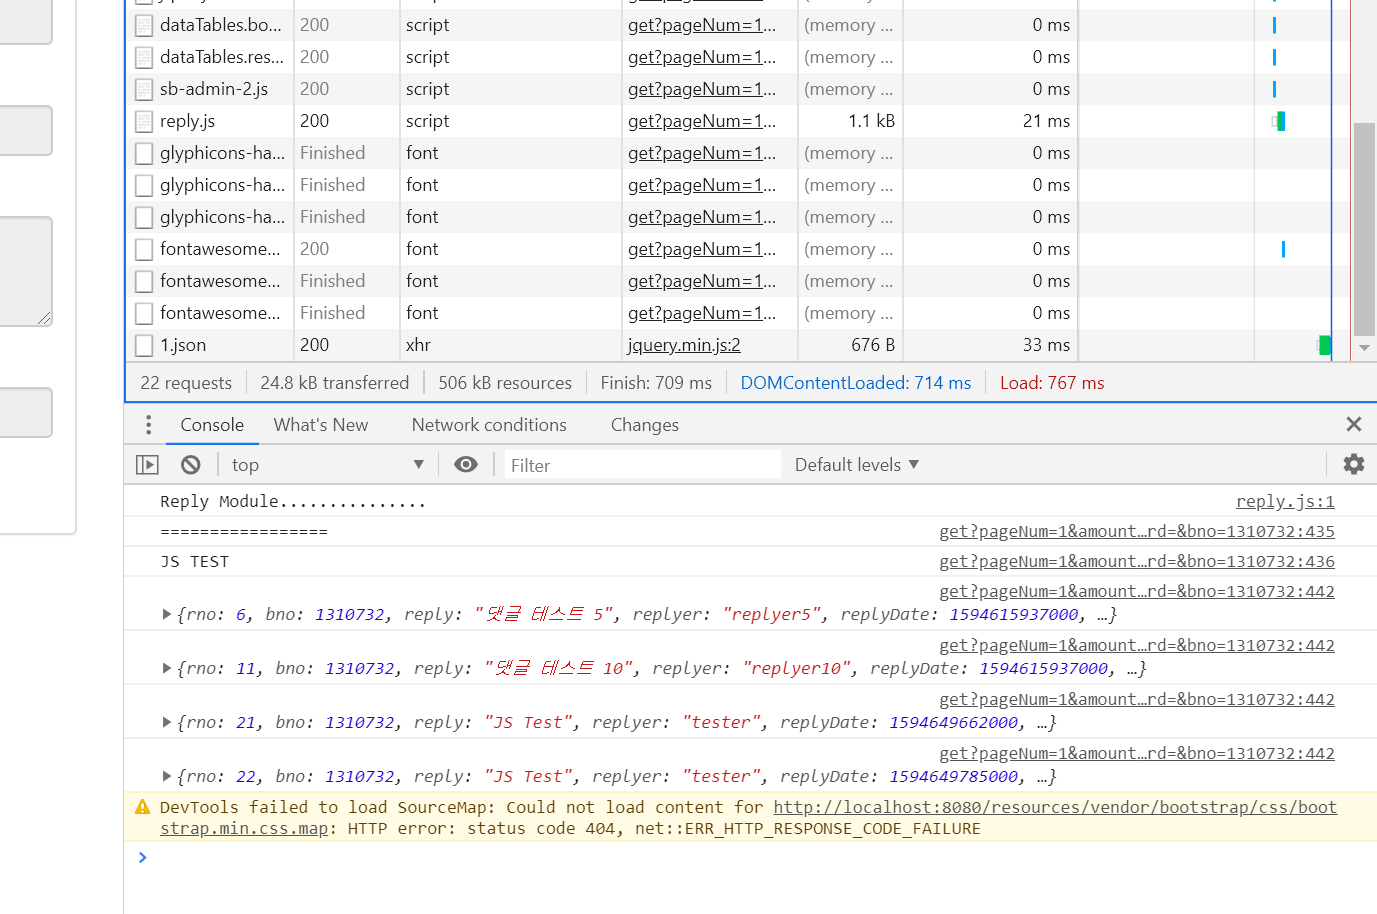
replyService.getList({bno:bnoValue, page:1}, function(list) {
for(var i=0, len=list.length || 0; i<len; i++) {
console.log(list[i]);
}
});
</script>
<script type="text/javascript">
$(document).ready(function() {
var operForm = $("#operForm");위는 get.jsp 수정
17.4.4 댓글 삭제와 갱신
console.log("Reply Module...............");
var replyService = (function() {
	function add(reply, callback, error) {
		console.log("add reply.........");
		$.ajax({
			type: 'post',
			url: '/replies/new',
			data : JSON.stringify(reply),
			contentType : "application/json; charset=utf-8",
			success: function(result, status, xhr) {
				if(callback) {
					callback(result);
				}
			},
			error : function(xhr, status, er){
				if(error) {
					error(er);
				}
			}
		})
	}

	function getList(param, callback, error) {
		var bno = param.bno;
		var page = param.page || 1;

		$.getJSON("/replies/pages/" + bno + "/" + page + ".json",
			function(data) {
				if(callback) {
					callback(data);
				}
			}).fail(function(xhr, status, err) {
				if(error) {
					error();
				}
			});
	}

	function remove(rno, callback, error) {
		$.ajax( {
			type: 'delete',
			url : '/replies/' + rno,
			success : function(result, status, xhr) {
				if(callback) {
					callback(result);
				}
			},
			error : function(xhr, status, er) {
				if(error) {
					error(er);
				}
			}
		});
	}
	return {
		add:add,
		getList:getList,
		remove:remove
	};
})();
	<script type="text/javascript" src="/resources/js/reply.js"></script>

	<script type="text/javascript">
	console.log("=================");
	console.log("JS TEST");

	var bnoValue='<c:out value="${board.bno}"/>';
	replyService.remove(6, function(count) {
		console.log(count);
		if(count==="success") {
			alert("REMOVED");
		}
	}, function(err) {
		alert('ERROR....');
	});
	</script>
각각 js와 get.jsp 파일 수정 부분
remove는 DELETE 방식으로 데이터를 전달하므로 $.ajax()를 이용해 구체적을 type 속성을 delete로 지정.
17.4.5 댓글 수정
console.log("Reply Module...............");
var replyService = (function() {
	function add(reply, callback, error) {
		console.log("add reply.........");
		$.ajax({
			type: 'post',
			url: '/replies/new',
			data : JSON.stringify(reply),
			contentType : "application/json; charset=utf-8",
			success: function(result, status, xhr) {
				if(callback) {
					callback(result);
				}
			},
			error : function(xhr, status, er){
				if(error) {
					error(er);
				}
			}
		})
	}

	function getList(param, callback, error) {
		var bno = param.bno;
		var page = param.page || 1;

		$.getJSON("/replies/pages/" + bno + "/" + page + ".json",
			function(data) {
				if(callback) {
					callback(data);
				}
			}).fail(function(xhr, status, err) {
				if(error) {
					error();
				}
			});
	}

	function remove(rno, callback, error) {
		$.ajax( {
			type: 'delete',
			url : '/replies/' + rno,
			success : function(result, status, xhr) {
				if(callback) {
					callback(result);
				}
			},
			error : function(xhr, status, er) {
				if(error) {
					error(er);
				}
			}
		});
	}

	function update(reply, callback, error) {
		console.log("RNO : " + reply.rno);
		$.ajax({
			type: 'put',
			url : '/replies/' + reply.rno,
			data : JSON.stringify(reply),
			contentType : "application/json; charset=utf-8",
			success : function(result, status, xhr) {
				if(callback) {
					callback(result);
				}
			},
			error : function(xhr, status, er) {
				if(error) {
					error(er);
				}
			}
		});
	}
	return {
		add:add,
		getList:getList,
		remove:remove,
		update:update
	};
})();
	<script type="text/javascript" src="/resources/js/reply.js"></script>

	<script type="text/javascript">
	console.log("=================");
	console.log("JS TEST");

	var bnoValue='<c:out value="${board.bno}"/>';
	replyService.update({
		rno:11,
		bno: bnoValue,
		reply: "js Modified Reply...."
	}, function(result) {
		alert("수정 완료...");
	});
	</script>
17.4.6 댓글 조회 처리
console.log("Reply Module...............");
var replyService = (function() {
	function add(reply, callback, error) {
		console.log("add reply.........");
		$.ajax({
			type: 'post',
			url: '/replies/new',
			data : JSON.stringify(reply),
			contentType : "application/json; charset=utf-8",
			success: function(result, status, xhr) {
				if(callback) {
					callback(result);
				}
			},
			error : function(xhr, status, er){
				if(error) {
					error(er);
				}
			}
		})
	}

	function getList(param, callback, error) {
		var bno = param.bno;
		var page = param.page || 1;

		$.getJSON("/replies/pages/" + bno + "/" + page + ".json",
			function(data) {
				if(callback) {
					callback(data);
				}
			}).fail(function(xhr, status, err) {
				if(error) {
					error();
				}
			});
	}

	function remove(rno, callback, error) {
		$.ajax( {
			type: 'delete',
			url : '/replies/' + rno,
			success : function(result, status, xhr) {
				if(callback) {
					callback(result);
				}
			},
			error : function(xhr, status, er) {
				if(error) {
					error(er);
				}
			}
		});
	}

	function update(reply, callback, error) {
		console.log("RNO : " + reply.rno);
		$.ajax({
			type: 'put',
			url : '/replies/' + reply.rno,
			data : JSON.stringify(reply),
			contentType : "application/json; charset=utf-8",
			success : function(result, status, xhr) {
				if(callback) {
					callback(result);
				}
			},
			error : function(xhr, status, er) {
				if(error) {
					error(er);
				}
			}
		});
	}

	function get(rno, callback, error) {
		$.get("/replies/" + rno + ".json", function(result) {
			if(callback) {
				callback(result);
			}
		}).fail(function(xhr, status, err) {
			if(error) {
				error();
			}
		});
	}
	return {
		add:add,
		getList:getList,
		remove:remove,
		update:update,
		get:get
	};
})();
	<script type="text/javascript" src="/resources/js/reply.js"></script>

	<script type="text/javascript">
	console.log("=================");
	console.log("JS TEST");

	var bnoValue='<c:out value="${board.bno}"/>';
	replyService.get(11, function(data) {
		console.log(data);
	});
	</script>
17.5 이벤트 처리와 HTML 처리
17.5.1 댓글 목록 처리
get.jsp 수정
<%@ page language="java" contentType="text/html; charset=UTF-8"
pageEncoding="UTF-8"%>
<%@ taglib uri="http://java.sun.com/jsp/jstl/core" prefix="c"%>
<%@ taglib uri="http://java.sun.com/jsp/jstl/fmt" prefix="fmt"%>
<%@include file="../includes/header.jsp"%>
<div class="row">
<div class="col-lg-12">
<h1 class="page-header">Board Register</h1>
</div>
<!-- /.col-lg-12 -->
</div>
<!-- /.row -->
<div class="row">
<div class="col-lg-12">
<div class="panel panel-default">
<div class="panel-heading">Board Read Page</div>
<!-- /.panel-heading -->
<div class="panel-body">
<div class="form-group">
<label>Bno</label> <input class="form-control" name='bno'
value='<c:out value="${board.bno}"/>' readonly="readonly">
</div>
<div class="form-group">
<label>Title</label> <input class="form-control" name='title'
value='<c:out value="${board.title}"/>' readonly="readonly">
</div>
<div class="form-group">
<label>Text area</label>
<textarea class="form-control" rows="3" name='content'
readonly="readonly">
<c:out value="${board.content }" />
</textarea>
</div>
<div class="form-group">
<label>Writer</label> <input class="form-control" name='writer'
value='<c:out value="${board.writer}"/>' readonly="readonly">
</div>
<button data-oper='modify' class="btn btn-default">Modify</button>
<button data-oper='list' class="btn btn-info">List</button>
<form id="operForm" action="/board/modify" method="get">
<input type='hidden' id='bno' name='bno' value='<c:out value="${board.bno}"/>' >
<input type='hidden' name='pageNum' value='<c:out value="${cri.pageNum}"/>' >
<input type='hidden' name='amount' value='<c:out value="${cri.amount}"/>' >
<input type='hidden' name='keyword' value='<c:out value="${cri.keyword}"/>' >
<input type='hidden' name='type' value='<c:out value="${cri.type}"/>' >
</form>
</div>
<!-- /.panel-body -->
</div>
<!-- /.panel -->
</div>
<!-- /.col-lg-12 -->
<div class="col-lg-12">
<div class="panel panel-default">
<div class="panel-heading">
<i claass="fa fa-comments fa-fw"></i> Reply
</div>
<!-- /.panel-heading -->
<div class="panel-body">
<ul class="chat">
<!-- start reply -->
<li class="left clearfix" data-rno='12'>
<div>
<div class="header">
<strong class="primary-font">user00</strong>
<small class="pull-right text-muted">2018-01-01 13:13</small>
</div>
<p>Good job!</p>
</div>
</li>
<!-- end reply -->
</ul>
<!-- ./end ul -->
</div>
<!-- ./ end row -->
</div>
</div>
</div>
<script type="text/javascript" src="/resources/js/reply.js"></script>
<script type="text/javascript">
console.log("=================");
console.log("JS TEST");
var bnoValue='<c:out value="${board.bno}"/>';
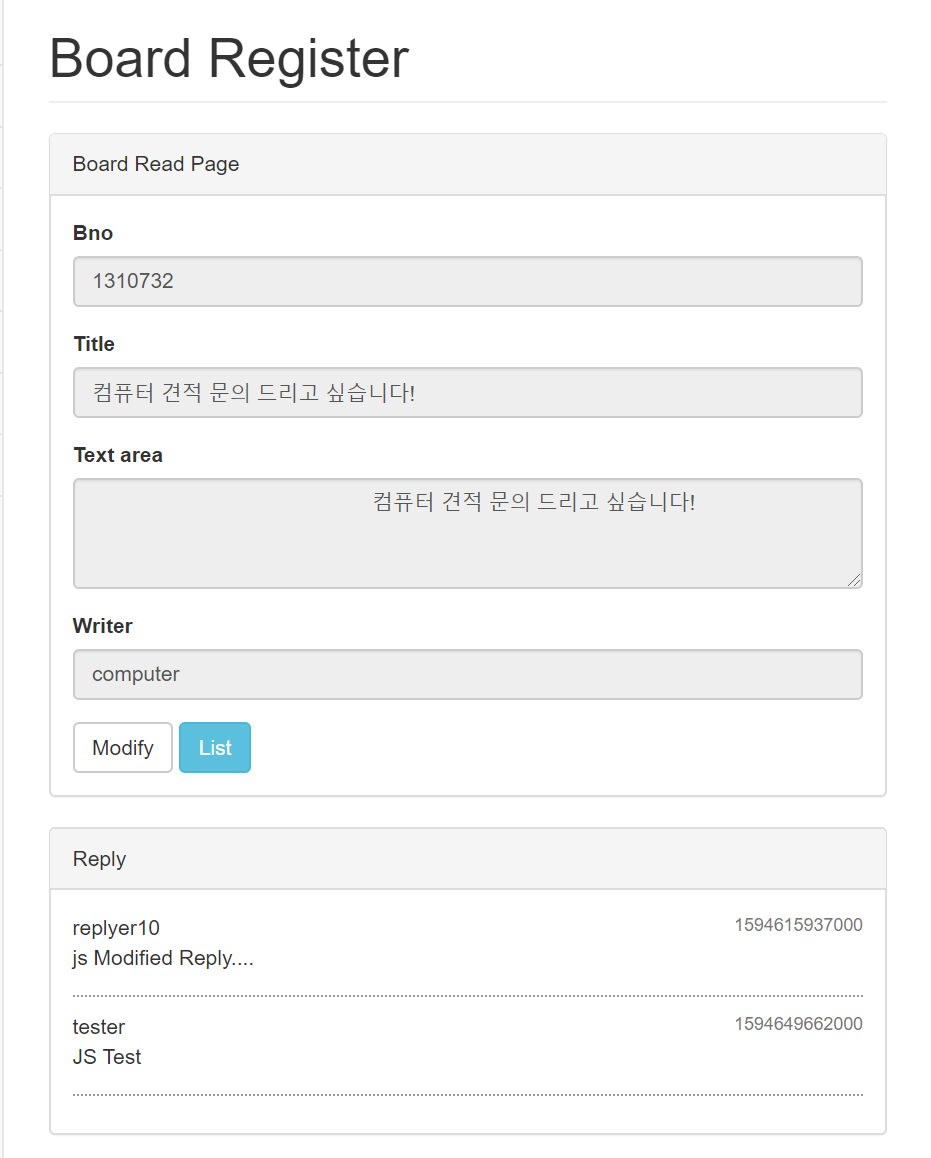
replyService.get(11, function(data) {
console.log(data);
});
</script>
<script type="text/javascript">
$(document).ready(function() {
var operForm = $("#operForm");
$("button[data-oper='modify']").on("click", function(e) {
operForm.attr("action", "/board/modify").submit();
});
$("button[data-oper='list']").on("click", function(e) {
operForm.find("#bno").remove();
operForm.attr("action", "/board/list");
operForm.submit();
});
});
</script>
</div>
<%@include file="../includes/footer.jsp"%>
댓글의 목록을 위해 별도의 div 생성.
댓글의 목록은 ul 태그 내에 li 태그를 이용해 처리.
이벤트 처리
게시글의 조회 페이지가 열리면 자동으로 댓글 목록을 가져와 li 태그를 구성해야 한다.
이에 대한 처리는 $(document).ready() 내에 이루어지도록 한다.
	<script type="text/javascript">

	$(document).ready(function() {
		var bnoValue = '<c:out value="${board.bno}"/>';
		var replyUL = $(".chat");

		showList(1);

		function showList(page) {
			replyService.getList({bno:bnoValue, page:page||1}, function(list) {
				var str = "";
				if(list == null || list.length==0) {
					replyUL.html("");
					return;
				}
				for(var i=0, len=list.length || 0; i<len; i++) {
					str+= "<li class='left cleafix' data rno='"+list[i].rno+"'>";
					str+= "    <div><div class='header'><string class='primary-font'>"+list[i].replyer+"</strong>";
					str+= "        <small class='pull-right text-muted'>" + list[i].replyDate+"</small></div>";
					str+= "            <p>"+list[i].reply+"</p></div></li>";
				}

				replyUL.html(str);
			});
		}
	});
	</script>
showList는 페이지 번호를 파라미터로 받도록 설계하고 만일 파라미터가 없으면 자동으로 1페이지가 되도록 설정.
브라우저에서 DOM 처리가 끝나면 자동으로 showList가 호출되며 ul 태그 내에 내용으로 처리된다.
만일 1페이지가 아닌 경우라면 기존 ul에 li들이 추가되는 형태이다.
시간에 대한 처리
XML이나 JSON 형태로 데이터를 받을 땐 순수하게 숫자로 표현하는 시간 값이 나오게 되어 있으므로 화면에선 이를 변환하는 게 좋다.
최근의 웹페이지들은 해당일에 해당하는 데이터는 시/분/초로 보여주고 전날에 등록된 데이터들은 년월일로 보여주는 경우가 많다.
아래는 reply.js
function displayTime(timeValue) {
		var today = new Date();
		var gap = today.getTime() - timeValue;
		var dateObj = new Date(timeValue);
		var str= "";

		if(gap < (1000*60*60*24)) {
			var hh = dateObj.getHours();
			var mi = dateObj.getMinutes();
			var ss = dateObj.getSeconds();

			return [(hh > 9 ? '' : '0') + hh, ':', (mi > 9 ? '' : '0') + mi, ':', (ss>9? '':'0') + ss].join('');
		} else {
			var yy = dateObj.getFullYear();
			var mm = dateObj.getMonth() + 1; //getMonth는 zero-based
			var dd = dateObj.getDate();
			return [yy, '/', (mm>9 ? '': '0') + mm, '/', (dd>9? '':'0') + dd].join('');
		}
	};

	return {
		add:add,
		getList:getList,
		remove:remove,
		update:update,
		get:get,
		displayTime: displayTime
	};
})();
	<script type="text/javascript">

	$(document).ready(function() {
		var bnoValue = '<c:out value="${board.bno}"/>';
		var replyUL = $(".chat");

		showList(1);

		function showList(page) {
			replyService.getList({bno:bnoValue, page: page||1}, function(list) {
				var str = "";
				if(list == null || list.length==0) {
					replyUL.html("");
					return;
				}
				for(var i=0, len=list.length || 0; i<len; i++) {
					str+= "<li class='left cleafix' data-rno='"+list[i].rno+"'>";
					str+= "    <div><div class='header'><strong class='primary-font'>"+list[i].replyer+"</strong>";
					str+= "        <small class='pull-right text-muted'>" +replyService.displayTime(list[i].replyDate)+"</small></div>";
					str+= "            <p>"+list[i].reply+"</p></div></li>";
				}

				replyUL.html(str);
			});
		}
	});
	</script>
17.5.2 새로운 댓글 처리
	<div class="col-lg-12">
		<div class="panel panel-default">
				<div class="panel-heading">
					<i class="fa fa-comments fa-fw"></i> Reply
					<button id='addReplyBtn' class='btn btn-primary btn-xs pull-right'>New Reply</button>
				</div>
				<!-- /.panel-heading -->
				<div class="panel-body">
					<ul class="chat">
						<!-- start reply -->
						<li class="left clearfix" data-rno='12'>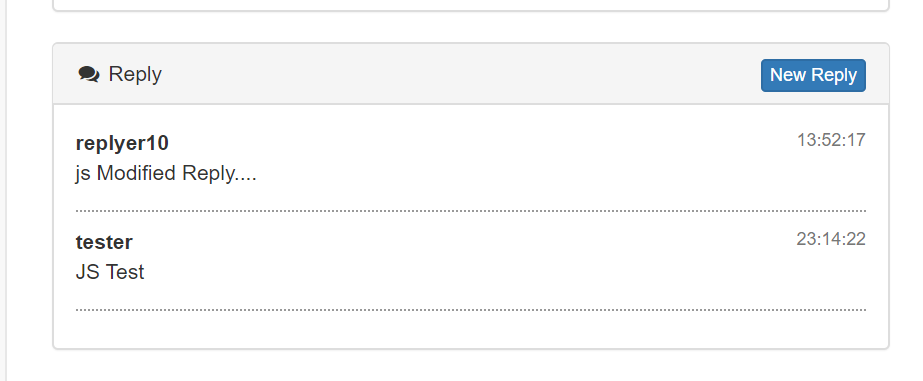
버튼 추가.
댓글 추가는 모달창을 이용해 진행.
script 태그 시작 전에 아래 코드 추가.
<!-- Modal -->
<div class="modal fade" id="myModal" tabindex="-1" role="dialog" aria-labelledby="myModalLabel" aria-hidden="true">
<div class="modal-dialog">
<div class="modal-content">
<div class="modal-header">
<button type="button" class="close" data-dismiss="modal" aria-hidden="true">×</button>
<h4 class="modal-title" id="myModalLabel">REPLY MODAL</h4>
</div>
<div class="modal-body">
<div class="form-group">
<label>Reply</label>
<input class="form-control" name='reply' value='New Reply!!!!'>
</div>
<div class="form-group">
<label>Replyer</label>
<input class="form-control" name='replyer' value='replyer'>
</div>
<div class="form-group">
<label>Reply Date</label>
<input class="form-control" name='replyDate' value=''>
</div>
</div>
<div class="modal-footer">
<button id='modalModBtn' type="button" class="btn btn-warning">Modify</button>
<button id='modalRemoveBtn' type="button" class="btn btn-danger">Remove</button>
<button id='modalRegisterBtn' type="button" class="btn btn-primary">Register</button>
<button id='modalCloseBtn' type="button" class="btn btn-default">Close</button>
</div>
</div>
</div>
</div>
새로운 댓글의 추가 버튼 이벤트 처리
	<script type="text/javascript" src="/resources/js/reply.js"></script>

	<script type="text/javascript">

	$(document).ready(function() {
		var bnoValue = '<c:out value="${board.bno}"/>';
		var replyUL = $(".chat");

		showList(1);

		function showList(page) {
			replyService.getList({bno:bnoValue, page: page||1}, function(list) {
				var str = "";
				if(list == null || list.length==0) {
					replyUL.html("");
					return;
				}
				for(var i=0, len=list.length || 0; i<len; i++) {
					str+= "<li class='left cleafix' data-rno='"+list[i].rno+"'>";
					str+= "    <div><div class='header'><strong class='primary-font'>"+list[i].replyer+"</strong>";
					str+= "        <small class='pull-right text-muted'>" +replyService.displayTime(list[i].replyDate)+"</small></div>";
					str+= "            <p>"+list[i].reply+"</p></div></li>";
				}

				replyUL.html(str);
			});
		}

		var modal = $(".modal");
		var modalInputReply = modal.find("input[name='reply']");
		var modalInputReplyer = modal.find("input[name='replyer']");
		var modalInputReplyDate = modal.find("input[name='replyDate']");

		var modalModBtn = $("#modalModBtn");
		var modalRemoveBtn = $("#modalRemoveBtn");
		var modalRegisterBtn = $("#modalRegisterBtn");

		$("#addReplyBtn").on("click", function(e) {
			modal.find("input").val("");
			modalInputReplyDate.closest("div").hide();
			modal.find("button[id!='modalCloseBtn']").hide();

			modalRegisterBtn.show();
			$(".modal").modal("show");
		});
	});
	</script>
댓글 등록 및 목록 갱신
새로운 댓글의 추가는 필요 댓글의 내용과 작성자 항목만으로 추가해 모달창 아래쪽 Register 버튼으로 처리.
		$("#addReplyBtn").on("click", function(e) {
			modal.find("input").val("");
			modalInputReplyDate.closest("div").hide();
			modal.find("button[id!='modalCloseBtn']").hide();

			modalRegisterBtn.show();
			$(".modal").modal("show");
		});

		modalRegisterBtn.on("click", function(e) {
			var reply ={
					reply: modalInputReply.val(),
					replyer: modalInputReplyer.val(),
					bno: bnoValue
			};
			replyService.add(reply, function (result){
				alert(result);
				modal.find("input").val("");
				modal.modal("hide");
			});
		});
	});
일부 내용 추가.
목록 자체를 갱신하기 위해 다시 소스 코드 수정.
		modalRegisterBtn.on("click", function(e) {
			var reply ={
					reply: modalInputReply.val(),
					replyer: modalInputReplyer.val(),
					bno: bnoValue
			};
			replyService.add(reply, function (result){
				alert(result);
				modal.find("input").val("");
				modal.modal("hide");

				showList(1);
			});
		});
17.5.3 특정 댓글의 클릭 이벤트 처리
별도로 클릭하는 것은 해당 댓글을 수정, 삭제할 경우.
DOM에서 이벤트 리스너를 등록하는 것은 반드시 해당 DOM 요소가 존재해야만 가능. 위와 같이 동적으로 li 태그들이 만들어지면 이후에 이벤트를 등록해야 하므로 일반적인 방식이 아닌 이벤트 위임delegation 형태로 작성해야 한다.
이벤트 위임은 실제로 이벤트를 동적으로 생성되는 요소가 아닌 이미 존재하는 요소에 이벤트를 걸어주고 나중에 이벤트 대상을 변경해주는 방식.
		$(".chat").on("click", "li", function(e) {
			var rno = $(this).data("rno");
			console.log(rno);
		});

	});
jQuery에서 이벤트를 위임하는 방식은 이미 존재하는 DOM 요소에 이벤트를 처리하고 나중에 동적으로 생기는 요소들에 대해 파라미터 형식으로 지정.
위의 경우 ul 태그의 클래스 chat을 이용해 이벤트를 걸고 실제 이벤트 대상은 li 태그가 되도록 함
이벤트는 ul에 걸었지만 각 댓글의 이벤트가 this가 된 것을 브라우저에서 확인할 수 있다.
		$(".chat").on("click", "li", function(e) {
			var rno = $(this).data("rno");
			replyService.get(rno, function(reply) {
				modalInputReply.val(reply.reply);
				modalInputReplyer.val(reply.replyer);
				modalInputReplyDate.val(replyService.displayTime(reply.replyDate)).attr("readonly", "readonly");
				modal.data("rno", reply.rno);

				modal.find("button[id != 'modalCloseBtn']").hide();
				modalModBtn.show();
				modalRemoveBtn.show();

				$(".modal").modal("show");
			});
		});

	});
	</script>
댓글을 가져온 후엔 필요 항목들을 채우고 수정 삭제에 필요한 댓글 번호는 data-rno 속성을 만들어 추가함

17.5.4 댓글의 수정/삭제 이벤트 처리
		modalModBtn.on("click", function(e) {
			var reply = {rno:modal.data("rno"), reply: modalInputReply.val()};
			replyService.update(reply, function(result) {
				alert(result);
				modal.modal("hide");
				showList(1);
			});
		});

		modalRemoveBtn.on("click", function(e) {
			var rno = modal.data("rno");
			replyService.remove(rno, function(result) {
				alert(result);
				modal.modal("hide");
				showList(1);
			});
		});


	});
	</script>
17.6 댓글의 페이징 처리
17.6.11 데이터베이스의 인덱스 설계
우선 댓글에 대해 고려할 일은 tbl_reply 테이블 접근 시 댓글의 번호가 중심이 아니라 게시물의 번호가 중심이 된다는 것.
댓글을 조회할 때 해당 게시물의 댓글을 가져오기 때문에, bno를 기준으로 where문이 적용된다.
tbl_reply 테이블의 PK는 rno이므로, "tbl_reply where bno=200 order by rno asc"로 쿼리를 실행하면 PK_REPLY를 통해 TBL_REPLY에 접근한다.
PK_REPLY로 검색을 하다보니 중간에 있는 다른 게시물의 번호들을 건너뛰어 가며 특정 게시물의 댓글을 찾아야 한다. 만일 데이터가 많아지면 성능에 문제가 생길 수 있다.
효율을 높이고 싶다면 게시물의 번호에 맞게 댓글들을 몽사 빠르게 찾는 구조를 만드는 것이 좋다.
이런 구조를 이용하게 되면 bno=200 order by rno asc 쿼리를 실행할 때 bno=200에 해당하는 범위만 찾아 사용하게 된다(range scan). 이러한 구조를 생성하는 것을 인덱스를 생성한다고 표현한다.
create index idx_reply on tbl_reply (bno desc, rno asc);
17.6.2 인덱스를 이용한 페이징 쿼리
인덱스를 이용하는 이유 중 하나는 정렬을 피할 수 있기 때문.
select /*+INDEX(tbl_reply idx_reply) */
	rownum rn, bno, rno, reply, replyer, replyDate, updatedate
    from tbl_reply
    where bno = 1310732
    and rno > 0
위 쿼리에서 실행 계획은 다음과 같다.

IDX_REPLY를 통해 테이블에 접근한다. 테이블에 접근해서 결과를 만들 때 생성되는 ROWNUM은 가장 낮은 rno 값을 가지는 데이터가 1번이 된다.
ROWNUM이 원하는 순서대로 나오기 때문에 페이징 처리는 이전에 게시물 페이징과 동일한 형태로 작성할 수 있다.
ReplyMapper.xml을 수정한다.
<select id="getListWithPaging" resultType="org.zerock.domain.ReplyVO">
	<![CDATA[
		select rno, bno, reply, replyer, replydate, updatedate
		from
			(
			select /*+INDEX(tbl_reply idx_reply) */
			rownum rn, rno, bno, reply, replyer, replyDate, updatedate
			from tbl_reply
			where bno=#{bno}
			and rno>0
			and rownum <= #{cri.pageNum} * #{cri.amount}
			)
			where rn > (#{cri.pageNum} -1) * #{cri.amount}
	]]>
</select>
</mapper>
테스트는 ReplyMapperTests
	@Test
	public void testList2() {
		Criteria cri = new Criteria(2, 10);
		List<ReplyVO> replies = mapper.getListWithPaging(cri, 1310732L );

		replies.forEach(reply -> log.info(reply));
	}

17.6.3 댓글의 숫자 파악
해당 게시물의 전체 댓글의 숫자 파악.
ReplyMapper 인터페이스에 메서드 추가.
package org.zerock.mapper;
import java.util.List;

import org.apache.ibatis.annotations.Param;
import org.zerock.domain.Criteria;
import org.zerock.domain.ReplyVO;

public interface ReplyMapper {
	public int insert(ReplyVO vo);
	public ReplyVO read(Long bno);
	public int delete(Long rno);
	public int update(ReplyVO reply);
	public List<ReplyVO> getListWithPaging (
			@Param("cri") Criteria cri,
			@Param("bno") Long bno);

	public int getCountByBno(Long bno);
}
ReplyMApper.xml에서는 id 속성값이 getCountByBno인 select 추가.
<select id="getCountByBno" resultType="int">
<![CDATA[
	select count(rno) from tbl_reply where bno = #{bno}
]]>

</select>
17.6.5 ReplyServiceImpl에서 댓글과 댓글 수 처리
ReplyServiceImpl 클래스의 List<ReplyVO>와 댓긍릐 수를 같이 전달할 수 있는 구조로 변경.
ReplyPageDTO 클래스 추가.

package org.zerock.domain;

import java.util.List;

import lombok.AllArgsConstructor;
import lombok.Data;
import lombok.Getter;

@Data
@AllArgsConstructor
@Getter
public class ReplyPageDTO {
	private int replyCnt;
	private List<ReplyVO> list;
}
ReplyPageDTO는 객체 생성 시 편리하도록 @AllArgsContructor를 이용해 replyCnt와 list를 생성자 파라미터로 처리.
ReplyService interface와 Impl 클래스에 메서드 추가.
package org.zerock.service;

import java.util.List;

import org.zerock.domain.Criteria;
import org.zerock.domain.ReplyPageDTO;
import org.zerock.domain.ReplyVO;

public interface ReplyService {
	public int register(ReplyVO vo);
	public ReplyVO get(Long rno);
	public int modify(ReplyVO vo);
	public int remove(Long rno);
	public List<ReplyVO> getList(Criteria cri, Long bno);

	public ReplyPageDTO getListPage(Criteria cri, Long bno);
}
	@Override
	public ReplyPageDTO getListPage(Criteria cri, Long bno) {
		return new ReplyPageDTO(
				mapper.getCountByBno(bno),
				mapper.getListWithPaging(cri, bno));
	}
17.6.5 ReplyController 수정
새롭게 추가된 getListPage()를 호출하고 데이터를 전송하는 형태로 수정.
getList 메서드 수정.
	@GetMapping(value="/pages/{bno}/{page}", produces= {
			MediaType.APPLICATION_XML_VALUE, MediaType.APPLICATION_JSON_UTF8_VALUE
	})
	public ResponseEntity<ReplyPageDTO> getList(
			@PathVariable("page") int page,
			@PathVariable("bno") Long bno
			) {
		Criteria cri = new Criteria(page, 10);
		log.info("get Reply List bno : " + bno);
		log.info("cri : " + cri);
		return new ResponseEntity<>(service.getListPage(cri, bno), HttpStatus.OK);
	}
기존과 동일하게 JSON 페이지를 전송하지만 ReplyPageDTO 객체를 JSON으로 전송하게 되므로 특정 게시물의 댓글 목록을 조회하면 아래와 같이 replyCnt와 list 속성을 가지는 JSON 문자열이 전송된다.
17.7 댓글 페이지의 화면 처리
- 게시물 조회 페이지에 들어오면 기본적으로 가장 오래된 댓글을 가져와 1페이지에 보여준다
- 1페이지 게시물을 가져올 때 해당 게시물의 댓글 숫자를 파악해 댓글의 페이지 번호를 출력
- 댓글이 추가되면 댓글의 숫자만 가져와 최종 페이지 찾아 이동
- 댓글의 수정, 삭제 후엔 다시 동일 페이지 호출
17.7.1 댓글 페이지 계산과 출력
Ajax로 가져오는 데이터가 replyCnt와 list 데이터로 구성되므로 이를 처리하는 reply.js 역시 이를 처리하는 구조로 수정.
	function getList(param, callback, error) {
		var bno = param.bno;
		var page = param.page || 1;

		$.getJSON("/replies/pages/" + bno + "/" + page + ".json",
			function(data) {
				if(callback) {
					//callback(data);
					callback(data.replyCnt, data.list);
				}
			}).fail(function(xhr, status, err) {
				if(error) {
					error();
				}
			});
	}
get.jsp의 showList 수정.
callback함수의 해당 게시물 댓글 수와 댓글 데이터를 전달하도록 한 부분.
get.jsp 수정
		function showList(page) {

			console.log("show list " + page);
			replyService.getList({bno:bnoValue, page: page||1}, function(replyCnt, list) {
				console.log("replyCnt : " + replyCnt);
				console.log("list : " + list);
				console.log(list);

				if(page == -1) {
					pageNum = Math.ceil(replyCnt/10.0);
					showList(pageNum);
					return;
				}
				var str = "";
				if(list == null || list.length==0) {
					re
showList 함수가 페이지 번호를 출력하도록 수정.
파라미터로 전달되는 page 변수를 이용해 원하는 댓글 페이지를 가져온다. 이 떄 만일 page 번호가 -1로 전달되면 마지막 페이지를 찾아 다시 호출하게 된다. 사용자가 새로운 댓글을 추가하면 showList(-1)을 호출해 우선 전체 댓글 숫자를 파악하게 하는 것.
이후에 다시 마지막 페이지를 호출해 이동시키는 방식으로 동작한다.
		modalRegisterBtn.on("click", function(e) {
			var reply ={
					reply: modalInputReply.val(),
					replyer: modalInputReplyer.val(),
					bno: bnoValue
			};
			replyService.add(reply, function (result){
				alert(result);
				modal.find("input").val("");
				modal.modal("hide");

				//showList(1);
				showList(-1);
			});
		});
div class=panel-footer 추가.
<div class="col-lg-12">
		<div class="panel panel-default">
				<div class="panel-heading">
					<i class="fa fa-comments fa-fw"></i> Reply
					<button id='addReplyBtn' class='btn btn-primary btn-xs pull-right'>New Reply</button>
				</div>
				<!-- /.panel-heading -->
				<div class="panel-body">
					<ul class="chat">

					</ul>
					<!--  ./end ul -->
				</div>
				<!-- ./ end row -->
				<div class="panel-footer">
				</div>
			</div>
		</div>
추가된 panel-footer에 댓글 페이지 번호를 출력하는 로직
		var pageNum = 1;
		var replyPageFooter = $(".panel-footer");
		function showReplyPage(replyCnt) {
			var endNum = Math.ceil(pageNum / 10.0) * 10;
			var startNum = endNum - 9;

			var prev = startNum != 1;
			var next = false;

			if(endNum * 10 >= replyCnt) {
				endNum = Math.ceil(replyCnt/10.0);
			}

			if(endNum * 10 < replyCnt) {
				next = true;
			}

			var str = "<ul class='pagination pull-right'>";
			if(prev) {
				str += "<li class='page-item'><a class='page-link' href='"+(startNum-1)+"'>Previous</a></li>";
			}

			for(var i=startNum ; i<=endNum; i++){
				var active = pageNum == i? "active":"";
				str+="<li class='page-item "+active+" '><a class='page-link' href='"+i+"'>"+i+"</a></li>";
			}

			if(next) {
				str+= "<li class='page-item'><a class='page-link' href='"+(endNum+1) + "'>Next</a></li>";
			}

			str += "</ul></div>";
			console.log(str);

			replyPageFooter.html(str);
		}
showReplyPage는 기존에 java로 작성되는 PageMaker의 Javascript 버전에 해당한다.
댓글 페이지를 문자열로 구성한 후 div의 innerHTML로 추가한다.
	function showList(page) {

			console.log("show list " + page);
			replyService.getList({bno:bnoValue, page: page||1}, function(replyCnt, list) {
				console.log("replyCnt : " + replyCnt);
				console.log("list : " + list);
				console.log(list);

				if(page == -1) {
					pageNum = Math.ceil(replyCnt/10.0);
					showList(pageNum);
					return;
				}
				var str = "";
				if(list == null || list.length==0) {
					return;
				}

			    for (var i = 0, len = list.length || 0; i < len; i++) {
			         str +="<li class='left clearfix' data-rno='"+list[i].rno+"'>";
			         str +="  <div><div class='header'><strong class='primary-font'>["
			      	   +list[i].rno+"] "+list[i].replyer+"</strong>";
			         str +="    <small class='pull-right text-muted'>"
			             +replyService.displayTime(list[i].replyDate)+"</small></div>";
			         str +="    <p>"+list[i].reply+"</p></div></li>";
			    }

				replyUL.html(str);
				showReplyPage(replyCnt);
			});
		}
showList의 마지막에 페이지를 출력하도록 한다.
for문 안에 있던 거 지우면 안 됨 ^^ 책에 낚였음...
		replyPageFooter.on("click", "li a", function(e) {
			e.preventDefault();
			console.log("page click");
			var targetPageNum = $(this).attr("href");
			console.log("targetPageNum : " + targetPageNum);
			pageNum = targetPageNum;
			showList(pageNum);
		});
댓글의 페이지 번호는 a 태그 안에 존재하므로 이벤트 처리에서는 a 태그의 기본 동작을 제한하고 댓글 페이지 번호를 변경한 후 해당 페이지 댓글을 가져옴
17.7.2 댓글의 수정과 삭제
modalModBtn.on("click", function(e) {
			var reply = {rno:modal.data("rno"), reply: modalInputReply.val()};
			replyService.update(reply, function(result) {
				alert(result);
				modal.modal("hide");
				showList(pageNum);
			});
		});

		modalRemoveBtn.on("click", function(e) {
			var rno = modal.data("rno");
			replyService.remove(rno, function(result) {
				alert(result);
				modal.modal("hide");
				showList(pageNum);
			});
		});
아래는 get.jsp 전체
modalModBtn.on("click", function(e) {
			var reply = {rno:modal.data("rno"), reply: modalInputReply.val()};
			replyService.update(reply, function(result) {
				alert(result);
				modal.modal("hide");
				showList(pageNum);
			});
		});

		modalRemoveBtn.on("click", function(e) {
			var rno = modal.data("rno");
			replyService.remove(rno, function(result) {
				alert(result);
				modal.modal("hide");
				showList(pageNum);
			});
		});